Hi Everyone!
After our little popcorn texture removal experiment, we still had an entire kitchen ceiling with a lovely stippled or “stomped” ceiling texture. Bonus, now we had a terrible scraped patch to disguise… but it was no problem, the plan from the beginning was to skim coat the ceiling anyway. We originally received a quote to skim coat the kitchen ceiling for around $850 – that seemed a bit steep for one room (at the time) – so… we decided to do it ourselves. We were ready to take it on! … little did we know the effort & time we were about to spend smoothing out this ceiling. In the end we were successful, but … well, let us just share our experiences below and let you be the judge. Onward to the project!
First – before we get to the photographs – we made a project review video!! It’s on the long side … so, feel free to skip around on it. At about 3 minutes in we discuss the tools we used, and further in we talk about the actual steps and process it took. Enjoy!
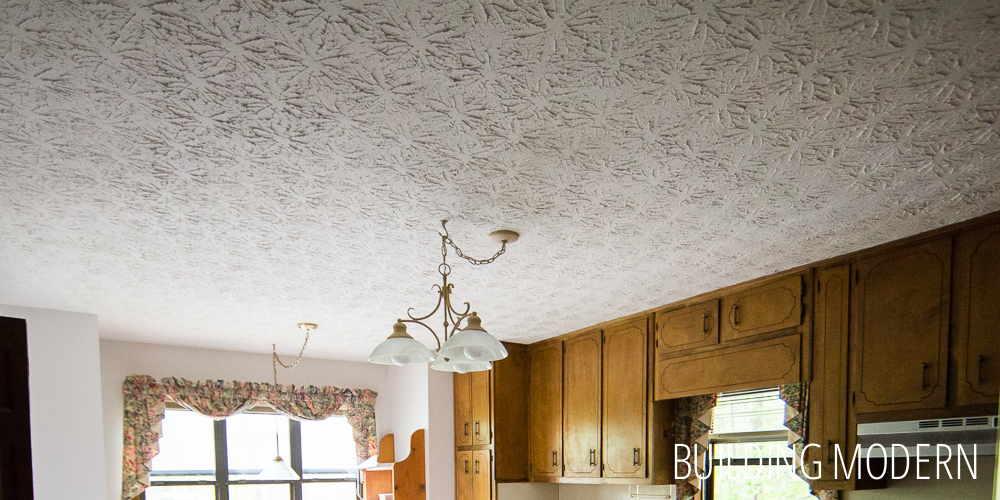
As a reminder – the kitchen ceiling before:
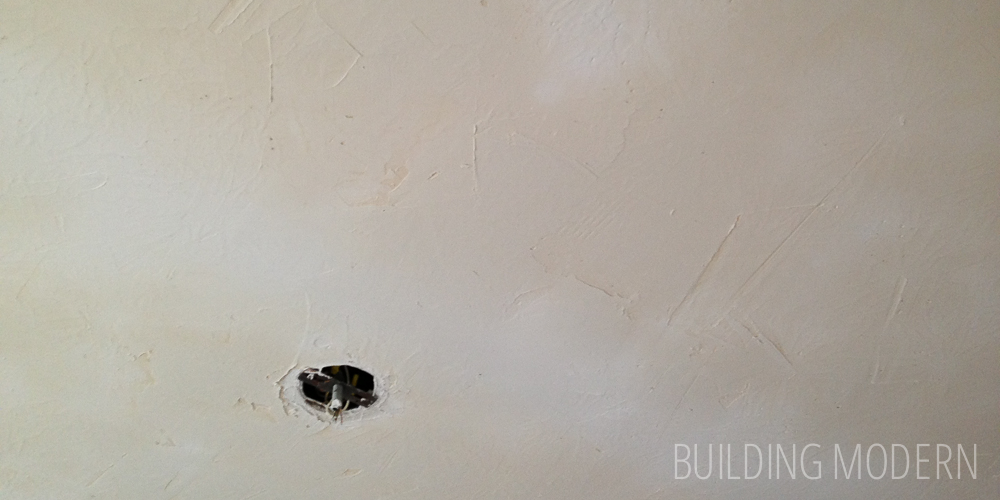
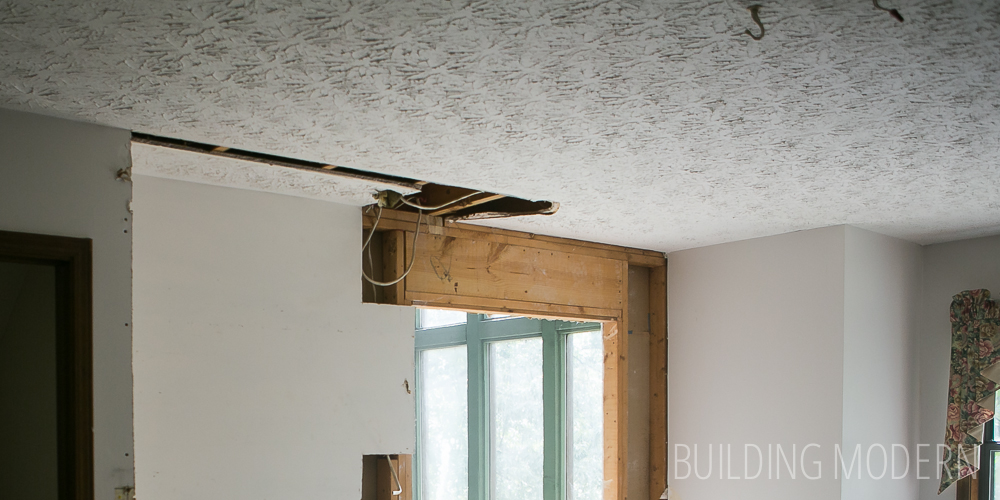
As we were going to update the kitchen, we knew it was likely that we were going to have damage / holes in the ceiling due to removing the cabinets & pantry – so, smoothing out the ceiling texture was already in the plan from the beginning. Surprisingly, though, the stipple continued behind the cabinets, so if we hand’t removed the pantry, there was a possibility of doing minimal work & keeping the stipple – if that was our goal…which it was not.
We anticipated that the cost to diy the kitchen ceiling would be approximately $150 in project-specific tools & supplies. We ended up spending $215. Here’s the breakdown:
- orbital sander (Bosch 6") - $159
- step ladder - $35
- aluminum work platform (Werner brand, 39 x 12 x 20 in.) - $49
- shop vac (& eventually new shop vac filter) - pre owned & $15
- glasses - $4/$6
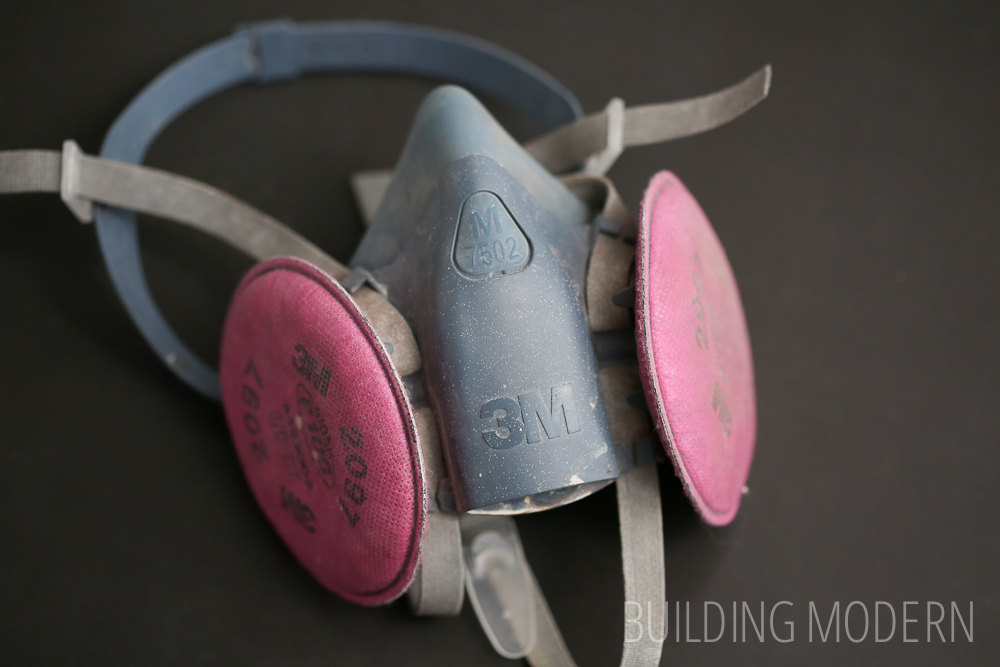
- respirator (3M 7502) (x2) ~ $25 each
- respirator filters (2097) ~ $10 two sets
- box fan ~ $20
- putty knife 3" (x2) - $4.37 each
- Taping knife - $9.94
- Knock-down knife 24" - $14.87
- Drywall knife - idk borrowed
- aluminum mud hawk (x2) - $11.77 each
- plastic mud pan 14" - $4.76
- sand paper (Diablo 6") ~ $6
- ultra lightweight sheetrock compound (ready mixed, 4.5 gal.) (x6) - $14.45 each
- plastic drop cloths (6 pack) - $10
- painters tape - $6
- ultra lightweight drywall (1/2 x 4 x 8) - $8.87
- sheet rock screws (1¼ in., 1 lbs.) - $6.47
- self adhesive mesh drywall tape (mold resistant, 300 ft.) - $7.27 each
- drywall saw - $5.48
- zinsser primer - $19.98
- ceiling paint (Behr 1 gal.) (x2) - $29.97
- paint roller frame - $3.74
- extendable paint roller frame - $9.87
- paint roller cover, economy (6 pack) - $8.97
- Metal roller tray - $3.40
- roller tray liners (10 pack) - $6.26
Do not buy:
• Pole sander – it’s frustrating, ineffective, & keeps flipping over and gouges the surface (this could be our own user error). For some reason everyone recommends it.
• Extension pole – too flimsy.
• Inside corner trowel / Curved bucket scoop – they are just not needed.

The steps:
1) We started this project after the room was clear of all cabinets, the floor was down to the subfloor, and the pantry had been removed (I’ll get to this little bit of renovation later). The point being, we had a room that could be completely covered in drywall dust and that was okay. But first, we turned off the house ventilation and covered vents. We also sealed off the two doorways with plastic drop cloths and painter’s tape.

2) Scrape off plaster points with the knock-down knife. This is relatively fast, easy, and satisfying.
3) Sand down the texture pretty significantly without going deep enough to damage the drywall. I will say that it is super important to wear proper protective gear during this entire process. At first, we tried the pole sander – this was a waste of time, frustrating and was not very effective for us. The sander kept flipping over when it encountered any resistance, so we broke out a regular sponge sand block. As we sanded, we had a box fan in the window to help suck out the dust.
4) Apply the drywall compound/mud so it fills the gaps in the texture. Glob some compound onto a tray & start smearing it onto the ceiling. Even if you consider yourself a very careful person, some of the compound will land on the floor – but, that’s just kind of unavoidable. The smoother you can be with the mud, the less sanding you will have to do – but at this point, it was just about filling in the spaces between the “spider web” texture.
The step ladder was good for me as I could get closer to the ceiling and I liked the angle better, while Spencer used the work platform. (We already owned the ladder, and were borrowing the platform.) I did have a lot more up and down/ moving the ladder than Spencer had with the platform. As a result, it did seem like he was able to make quicker progress with the platform. I found that I preferred to keep my compound in the troph style pan while Spencer used the flat mud hawk.
The ultra light weight compound that we were using was pretty “airy” in the container, but after working with it (aka smushing it around) most of the air bubbles were worked out and it developed a more smooth/creamy texture. Additionally, to reduce air bubbles, you can also mix about a teaspoon of dish soap in the bucket of drywall compound and mix using an electric drill and mixing bit.
5) Let dry. This will take at least a day.
6) Sand. (In retrospect, we should have sanded between coats – but we did not.)
7) Clean up. This involved the shop vac and the box fan in the window.
8) Apply second coat of mud. (This was tricky – it was hard to tell what you had covered due to being so close to the ceiling itself. This resulted in a lot of up and down the ladder.)
9) Let dry. This will take at least a day.
10) Sand. Again, sanding drywall is super messy. While Spencer sanded (this time he opted for his 6″ orbital sander … not something we’d really recommend but it did get the job done), I mimicked his sander movements with the shop vac hose keeping the hose as close to the sanding as possible. This sort-of worked – but it was far from perfect from keeping the dust down. (Note: this was before we discovered that the shop vac attachment for our sander was super inexpensive, just a few dollars – that would have been nice to know prior to starting this project.)
11) Apply a third coat of mud. (we did not do this… but we probably would have had better results has we done this.)
12) Sand.
13) Clean up. This time, Spencer thought it was a good idea to use the leaf blower to blow all the dust out of the windows. It did work fairly well – imagine billowing white dust coming out of the house. I think he did this multiple times, letting the dust settle between. I wish I knew what the neighbors were thinking. Ultimately though, we had to use the shop vac again.
14) Apply primer & ceiling paint. Compared to plastering and sanding, painting was not a big deal. Let dry & repeat with a second coat. Though, it is kind of difficult to tell where you have painted & haven’t – white on white and all.
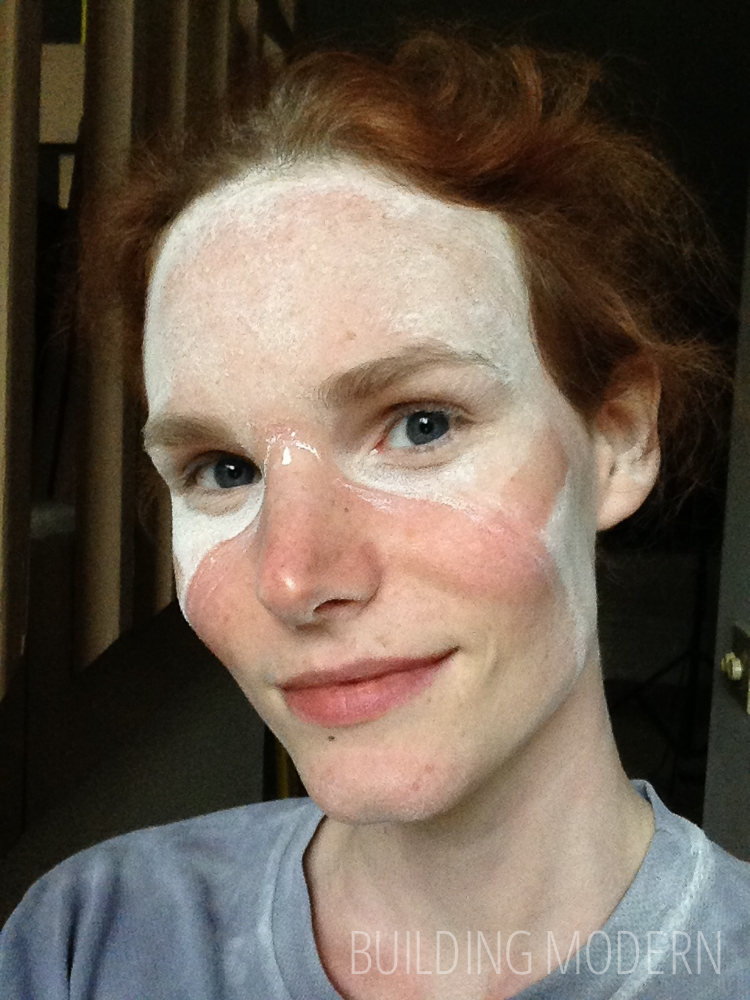
This process kills your hands, your arms hurt, and your neck hurts from looking up. It’s not just messy, its like glitter messy: drywall dust gets every where. The reason I have no photographs from the process is that this project was so dusty – I didn’t want to expose my camera to the kitchen air. So no in-process photos for you!
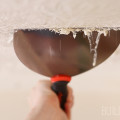
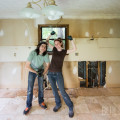
Heres one of the only selfies I’ve ever taken, I think I look surprisingly optimistic. (I was wearing protective glasses, btw. The outline is from the respirator.)
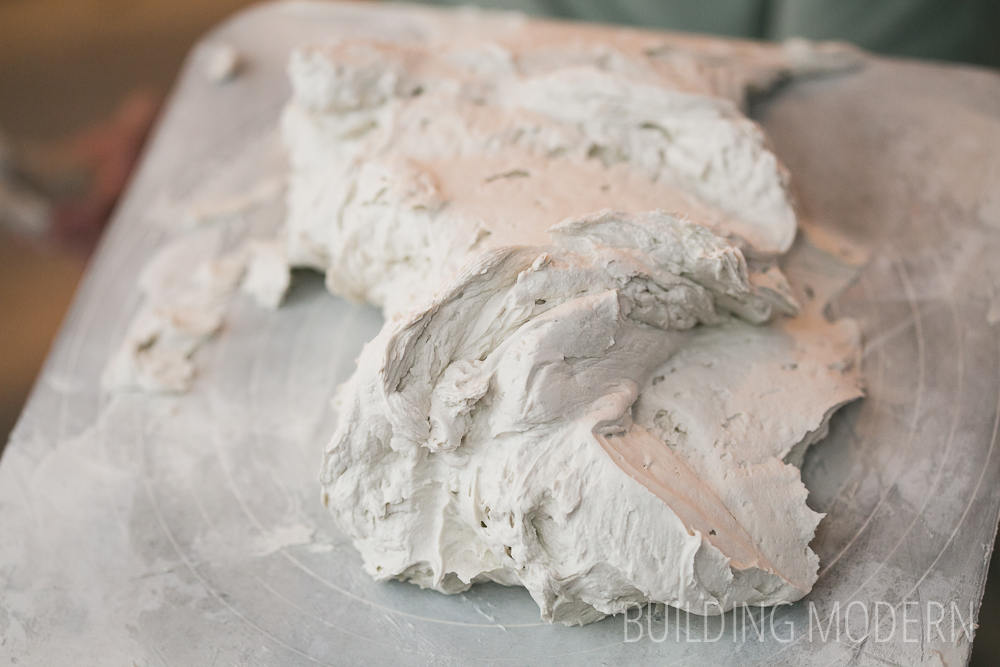
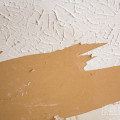
Plaster drying on the ceiling after the first coat. Notice that the original spider web pattern is still visible through the first coat of mud. It is a little difficult not to gouge the wet plaster with the putty knife. The lighter areas are where the plaster has dried more, the darker areas are where it is still wet.

The whole process took around five days (not including shopping beforehand for supplies.) During the dry time, we took on some other projects like striping wall paper, priming, and expanding a door frame… you know, little stuff. 🙂
The after:
I will admit that it isn’t the most perfectly smooth finish and we could have / should have done a third coat to really get out those last few air bubbles, but honestly we were tired and it was close enough… and this way it would look like a plastered ceiling (which it is) instead of drywall. You can see some swirls from the orbital sander.
In the end, I’m glad we had the experience and spent a fraction of what we were quoted. And, I’m glad we are now informed about the difficulty of the project so we know how to gauge effort and time for other rooms. As a result, I would possibly do some of the smaller rooms in the house, but I am interested in what a whole house quote would look like. At the very least, knocking down the points of the texture does a lot – so that is a half solution option. Like many people, one thing we do not have in abundance is time: I’m glad for the experience, but I don’t need to necessarily repeat it. (Especially when there are other projects that could use our attention.) This is definitely one of those projects that it just might be best to hire someone over DIY’ing it. Now that I know how much labor is involved, that $850 quote seems about right.
A few of our rooms still have this textured ceiling, so I’ll be smoothing them out at some point. Thanks for the helpful post!
Thanks for your detailed story. Our 1985 house is 2/3 stippled-ugh. I’m doing one small bedroom. Painted ceilings; water won’t absorb. So, used a belt sander. Talk about tired arms and dust-whoa. On second mud coat. So: better than before but what a job..! Styles change and we’re paying for it, huh?
We agree!! You’re doing better than us – we stopped at the second coat here. We’re about to try a 1/4″ v-groove wood panel cover-up on our higher ceilings – can’t wait to share!
Just thought I’d throw out a simpler and quicker alternative to skim coating an entire ceiling. If you don’t have crown molding or other obstructions to deal with, it’s a lot simpler to just put another layer of sheetrock over the ceiling. You’ll still have to tape, skim and sand the sheetrock joints and corner bead where the wall and ceiling meet, but it’s tons quicker way less messy, and easier to get professional results. Any thickness sheetrock can be used, all the way down to 1/4 inch. This method also helps hide any uneven joists that ceilings usually have lurking under the ugly texture that builders use for the whole purpose of hiding a multitude of workmanship sins and cutting corners.
Thanks Terence – also, to add on to that last statement there. If the drywall *is* uneven, before applying new drywall over it, you can add strapping to even it out. This *would* lower the overall ceiling by even more (3/4 – 1″ depending on the strapping used); however, it is an option to at least bring up as well. 🙂
Coming up (in a bit, we’re taking on other projects for now) – we’re going to actually compare three more methods. What you described above (which we expect to be the best/easiest), tearing down the existing drywall and replacing with new (we need to add more lights anyway), and then the v-groove I mentioned above. We’ll definitely be posting & will share what we find to be easiest for DIY. Thanks again Terence!! We hope you continue to contribute here – this is great!!
Very informative. Thanks for taking the time to write this very fine post on smooth ceiling and sharing your knowledge.
You guys are hard workers! I am looking into smoothing out an entire house of textured ceilings. Just curious, why didn’t you rent an electric drywall sander with vacuum hose from Home Depot or Lowe’s? Wouldn’t that have been pretty simple to use?
MJ, Honestly… I don’t recall why we didn’t rent an electric drywall sander. It could have been that we didn’t know about the machine at the time. It also might not have been in our budget – at $51/ day, plus additional sandpaper… we were keeping everything very tight at the time.
Those work, but generate a *huge* amount of dust! Make sure you get a vac attachment if you go this route.
Hi there! This will be the first time for me taking a ceiling from the popcorn texture to smooth but I can not wait to have it completed! I am lacking out that I’m doing a rather small 2nd bathroom as my first trial into smooth ceiling gs and I must say that you guys have given me more information than I have found anywhere else. So, applause and thank you again for the ample supply of information! I also wanted to say that I have tackled the first phase in this project which was taking down the hideous 80’s wallpaper! Which turned out to be easier then I had ever expected! Though it did reveal some drywall issues that I’ll have to tackle….separation of ceiling to wall joints,ugh….some mold around the bathtub! Even more ugh! Anyway, I’ll most definitely give you guys an update on here as I do not have a website of my own. Happy DIY to you guys and good luck on all future endeavors!
Thanks for the complements! I’d love to hear about how your project is going! It’s definitely smart to tackle a smaller “test” room before committing to a large space. Fortunately, it looks like popcorn texture is an easier project than stippled mud. Get after those joints with drywall mesh and mud and you’ll be fine! Have a happy diy to you too!
You can save on the first sand + cleanup steps! Instead of sanding down your first coat, scrape any ridges away with a putty knife. This probably won’t generate enough dust that you will need to clean it off the wall, and you can go right to your second coat. Sand the final coat down as usual.
THANK YOU. Everybody has advice for “popcorn” ceilings, but I could not find any info on how to deal with a textured ceiling like this. Super helpful!
Hi guys! As a drywall finisher for 30 years, I know the frustrations you went through. Slicking out stomped ceilings aren’t easy. It’s actually a 5 step process. I use an electric drywall sander for my jobs. The first step is to use a roughest grit sand paper you can find, and do an initial sanding on your ceiling. This will help when you apply your first coat of mud. Once it’s pre-sanded, the second process is to full float. This is the most vital part of the job, because you are molding the ceiling with the first coat. Your mud will shrink, is you’re nervous as to how it looks, remember that mud shrinks throughout the drying process. Once your first coat is dry, you will then sand again. This time, make sure you sand “just enough”. If you’re using an electric sander, make sure you are not sanding in one spot too long. That will cause craters to form, and you will notice it once the ceiling is painted. After sanding for the second time, it’s time for the final coat of mud. You are basically putting it on, and taking it back off. You are filling only the imperfections, but don’t take too much mud off. After that coat dries, it’s time to do the final sanding. You can use the electric sander for the most part, but you will need to hand sand the angles. So, in conclusion, YES, it is definitely a huge job. Just take these steps and you should be fine next time you want to accomplish a task yourself.
I just purchased a house that has the “starry ceilings” or “stomped ceilings” on every level. I have been doing a lot of research, my husband and I are not the most handiest people around, therefore we intend to hire a contactor to add a level of drywall to the ceilings. But thanks for your post, I didn’t find a lot of information on the internet about these type of ceilings, but you helped make our decision much easier.
Did you try spraying the ceiling with water and scraping it down? Popcorn ceilings will come off when saturated with water (if painted you have to scrape through the paint first sprat scrape repeat) It may be possible to spray and scrape the stomped ceiling depending on the material? I cleaned a spot on my stomped textured ceiling with water and it dissolved to a flat spot, so I can probably smooth that off with water and a scraper. I’m working on another ceiling now currently skim coating after removing the popcorn surface. It’s very labor intensive. I’m using a drywall hawk and trowel which is faster and easier to get smooth than working with a tape knife.
Hi Savbill,
Yes, there are many posts about the process we went through here. We did try spraying it with water – while this works for popcorn ceilings, it often times does not work for stomped or stippled ceilings. And, when we did try to scrape it off, it also brought off the paper underneath. We *really* wanted the water trick to work, it just didn’t for us – it depends on the mixture that was used in the first place when the texture was applied to the ceiling.
I have a 20 ft by 20 ft living room with tiled ceiling. I tore them down and drywalled and painted the ceiling. Much easier than trying to smooth textured ceiling. I have a small bedroom that is textured and that ceiling is coming down!
We just bought a 2800 sq ft house built in 1987 and has stomped tiger skin textured ceilings throughout first and second floor. There is also crown molding and recessed lighting as well as vents for the central AC in some of the rooms. Assuming this would involve a ton and months of work going with the drywall method. We’re debating whether or not it’s worth it.
At that level and quantity, it may be worth hiring a professional or just not even attempting it. It does make a huge mess and is a lot of work if you do it yourselves. If you hire it out, it could easily cost in the thousands.