
After a nice hiatus from countertops, we still had to finish up the entire project by making matching concrete waterfall sides for our kitchen island. The waterfall sides are made the exact same way as the other concrete countertops… but there is one exception: they will have a portion of their backsides finished as well.
We started by making a template for the two sides: nothing is going to be perfectly square, so the template will give us the best fit.

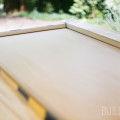
Here, you can see the portion of the waterfall edge that will be exposed (and therefore needs to be finished) where the stools will sit.

We created forms based on the templates and made out of melamine. For more on this process visit the blog post Part 2 on templates & forms.

We sprayed on the “beauty coat” (which contained pva fibers) and continued layering in and compacting concrete reinforced with glass fiber. For more on this process, visit Part 4 and Part 5 blog posts.

Here’s were things changed a little from the typical countertops: we added an additional piece of melamine to the top aka backside of the slabs to hopefully help create a smoother surface. (I should mention, the countertops are made face down.)
Here Spencer is unscrewing the extra board after the waterfall sides have cured.

One turned out fairly well, while the other did not for some reason – the result was a flaky mess. We have no idea what happened unfortunately – there could have been a mis-measurement of components somewhere along the way. In general though, the slab looked fine, we just had to grind off the flaky bits. (The thickness of the slab was still acceptable even with a little additional grinding.) Normally, the undersides of the countertops are ground down just enough to ensure they are level, but are then left unfinished. Here, we will be finishing this part of the “underside” because they will be exposed.

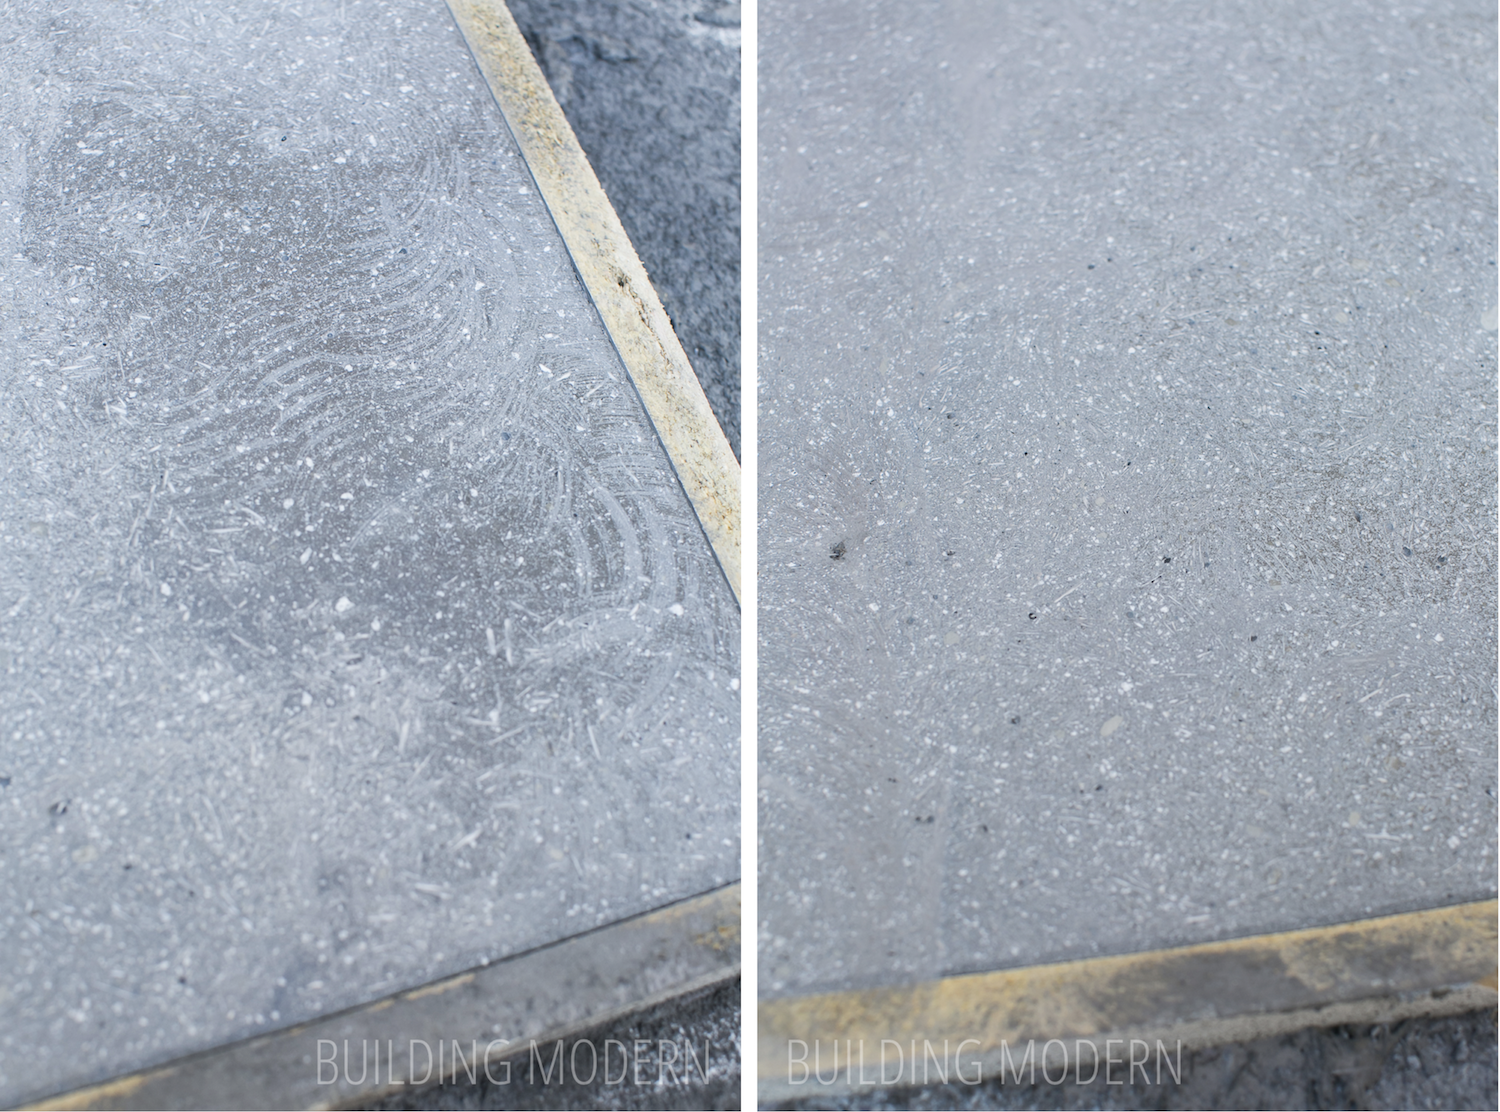
This is an example of the same slab: the smoother side is where we applied the extra board (you can see where the concrete kind-of oozed over the edge) and the normal, compacted concrete side (with the waffle texture).

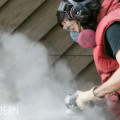
Next up: bring the whole thing outside and knock down the high points with the angle grinder:

Because this is a two-sided waterfall countertop, Spencer continues to refine the portion that will be visible. (With a normal countertop, the slab would be flipped to the front side at this point and finished).

Making sure everything is as even as possible with a straight edge:

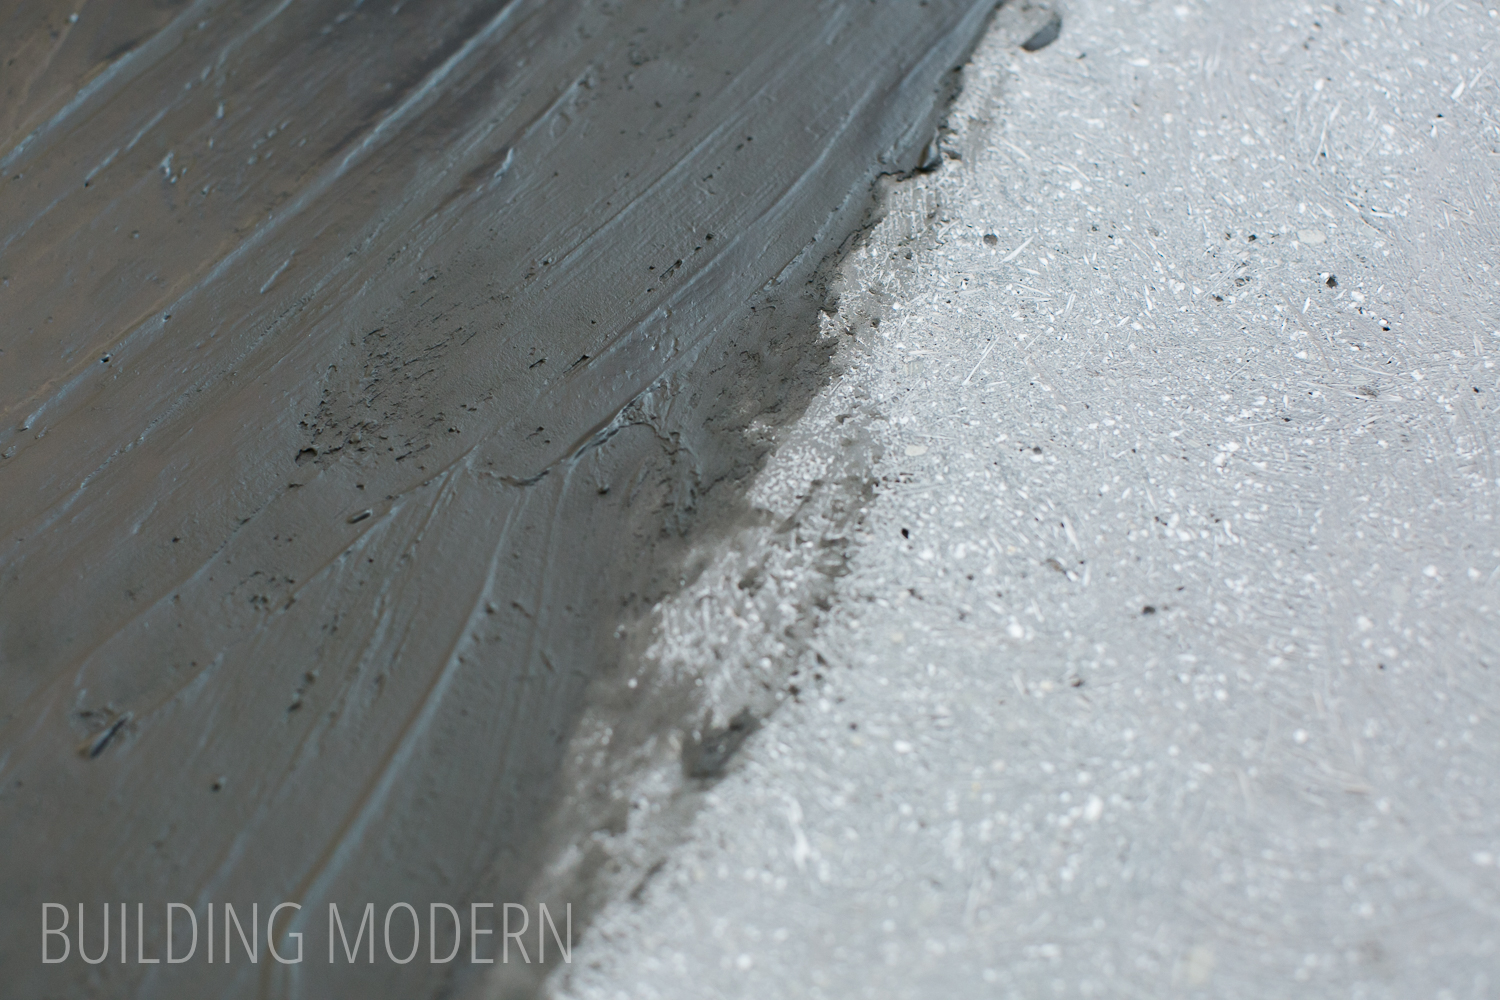
The slab that has been ground on the left and not on the right (with the smooth “board covered area” to the extreme right:

After the angle grinder, multiple sheets of sanding paper are used for a even smoother surface. This is just a quick rundown, for more on the “finishing” process visit this blog post Part 6: Finishing.

We were keeping the slab in the mould so we could gauge the proper depth of the slab.

The difference between the concrete with just the angle grinder versus sanding. Here you can see a bit of the glass fibers (pva – which “disappear” more effectively – were used on the opposite front side) and a few air holes.
We applied the “slurry coat” to the exposed backside of the slab. (Again, this is abnormal for a regular one-sided countertop). The slurry coat does not contain sand or any fibers, so the thiner gloves are acceptable to use in this situation.

The slurry coat really looks dark compared to the countertop, but they were both colored with the same percentage of black oxide powder.


After the underside slurry coat dried and was sanded… we flipped the slabs, applied a slurry coat, let them dry, sanded, and finished the front side (with TK6 NanoCoat finish). We then flipped them back to the underside (protecting them with cardboard) and finished the original underside as well.

The slab that looked decent from the beginning had a pretty good result.

The severely chipped slab turned out better than I thought it would. This isn’t a perfect result, but it will be placed under the island where your legs go and will be hidden by the stools a little. I would have rejected this if this was for a top of a countertop, but I think it won’t be as noticeable under the island. (Especially when backlit from the windows).

Rewinding a bit, prior to finishing the “undersides” we did remove the slab from the melamine and flip it to finish the “front side”.

Slowly using shims to separate the countertop from the melamine surface:

Here are the finished fronts of both waterfall sides.

We brought the slabs into the kitchen (the island top was not fully attached yet) and dry-fit them into place.


A closer look at the finished underside waterfall edge. Here you can see a bit of a gap between the countertop and waterfall side.

The underside of the existing island countertop was not perfectly even… so we marked the problem areas with painter’s tape.

We used a rasp (or two) to knock off the problem high points. A rasp would allow us to remove material without blowing crazy amounts of concrete dust into the air.

In order to disguise the transition between the countertop and sides, we mixed our own color-matched caulk with the same black oxide we used in the countertops.

We used the same technique for any caulk application: painter’s tape for a clean edge.

Here’s a easy comparison of what the “undersides” of the waterfall slabs would have looked like if we hadn’t finished them. The underside of the island countertop versus the finished underside of the island sides:

Tada! We used construction adhesive to attach the sides to the cabinets by the way.


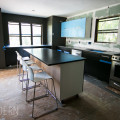
The finished kitchen:

The waterfall sides were – in general – not as perfectly clean looking as our other countertops. Fortunately the sides are not as noticeable as the countertop surfaces. I am pretty happy that the sides were a great color match to the existing tops.
If you’d like a more organized list, here’s all of our concrete countertop posts:
Part 1) Materials and tools needed
Part 2) Making the templates & forms
Part 3) Preparation for the pour
Part 4) The first stage: spraying the beauty coat
Part 5) The second stage: compacting
Part 6) finishing: grinding, sanding, coating
Part 7) installation day
Part 8) the reveal
Part 9) Island waterfall sides

Other Related posts:
 Kitchen: diy concrete countertops – the second stage of making concrete countertops reinforced with glass fibers
 Kitchen: diy concrete countertops – the first stage of making concrete countertops reinforced with PVA fibers
 Kitchen: diy concrete countertops – making the templates & forms
 Kitchen: DIY concrete countertops – reveal
 Kitchen: DIY concrete countertops – finishing